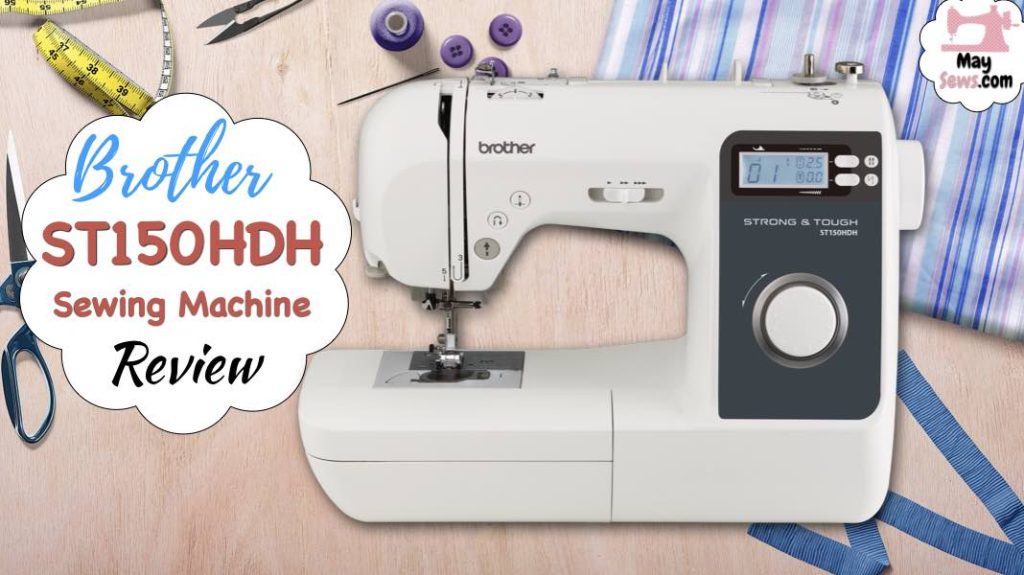
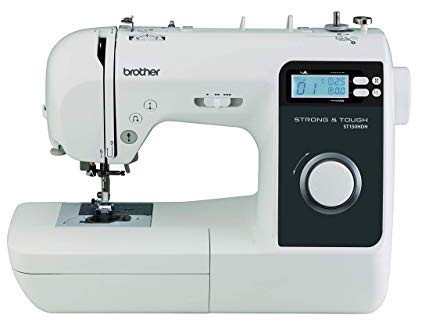
The Brother ST150HDH sewing machine looks really cool with mostly white color, but a little added black on the side is nice. This model is definitely very new. I just checked this model and it was just released April 2019.
If you need a strong and tough sewing machine to sew multiple layers of fabric then this is the one you should go for.
I am serious, this model can sew a lot of layers of fabric like denim. You do have to use the presser foot lever to raise the presser foot higher to be able to sew all the layers.
I like the way this model looks, and it comes with a lot of built in features. Not to mention it has 50 stitch styles to select from.
Speaking of sewing multiple layers of fabric, there is another model made by the same Brother company and it is the ST531HD. It comes with a finger guard.
Table Of Contents
- Is The Brother ST150HDH Sewing Machine Worth The Price?
- Features and Benefits
- Frame
- Stitches
- Turn It Into A Free Arm
- Type Of Fabrics It Can Be Used On
- Feed Dogs
- LCD Display Screen
- Adjust The Width and Length Stitch
- Built In LED Light
- Speed Control Slider
- Start/Stop Button
- Foot Controller
- Twin Needle
- Automatic Bobbin Winder System
- Needle Threader Lever
- Free Motion Quilting
- Thread Cutter
- Needle Stop Position (Up/Down)
- Needle Position Button
- Thread Tension Dial
- Reverse/Reinforcement Stitch Button
- Accessories
- Feet
- Brother ST150HDH Review
- Weight And Dimensions
- Warranty And Manual
- FAQ
- Does this model come with an extended or wide table?
Is The Brother ST150HDH Sewing Machine Worth The Price?
To me this model is well worth the price tag if it performs as claimed with all these features. I especially love sewing machines that can sew a lot of layers of fabrics all together. This is definitely a tough sewing machine.
Features and Benefits
Let me break down what features are included for this model. This model is loaded with a lot of features and accessories.
Frame
I am happy to report to you that this model has a metal frame interior. I don’t find that many sewing machines made by Brother that have a metal frame.
Despite having a metal frame this model’s weight isn’t that heavy. It’s just around 10 pounds. It is pretty light to me and it is fairly easy for me to take to a different location.
It would be even more awesome if it came with a carrying case or a hard cover, but sadly it only comes with a soft cover. It’s better than nothing. At least I can use it to protect from dust. Dust can built up very fast, especially if you are not using it.
Stitches
This model has 50 built in stitches. Of the 50 stitch styles, 5 of them are one step buttonhole stitch styles.
The machine doesn’t have the imprinted stitch patterns on it but it comes with a stitch pattern plate and a holder. So it is up to you whether to use it for reference or not.
It’s most likely you will need it since you won’t be able to remember the pattern stitches at first. You are supposed to attach it on top of the machine. It is pretty handy because it is removable.
The user manual also has the stitch pattern numbers. It is on pages 88 to 91. You can use this model to sew basic, hemming, decorative, quilting and others stitch styles. It has plenty to choose from.
Turn It Into A Free Arm
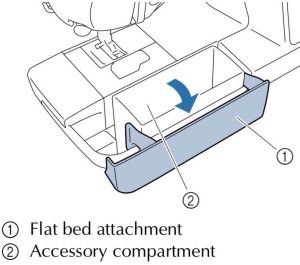
Nowadays most of the sewing machines will usually come with this feature. I believe it is because it makes sewing handcuffs and sleeves so much easier when it is converted into a free arm.
It is kind of like an ironing board where the smaller end is designed to iron your sleeves and pants when you put them all the way in.
It is a pretty handy little feature. When you need it just turn it into a free arm, and when you don’t need it just use it as a storage compartment. How useful is that?
This model has expanded to give you more room to sew on bigger projects and quilting as well. It will give you about 6. 4” W x 4. 1″ H working space measuring from the needle to arm.
Type Of Fabrics It Can Be Used On
This model can be used for all kinds of fabrics from silk to denim. Below types of fabrics can be used for this model. Be sure to use the correct type of needle to do the sewing.
For example, you will need a needle size of 100/16 to sew denim fabric. This type of fabric is in the thick category, so you will need a thicker and stronger needle to get the job done. If you are using the wrong needle size like the 65/9 needle size, then it will easily break.
- Lawn
- Georgette
- Challis
- Satin
- Broadcloth
- Taffeta
- Flannel
- Gabardine
- Denim
- Corduroy
- Tweed
- Jersey
- Tricot
- Cotton
- Faux leather
- Faux suede
You should also use the correct size of thread for the type of fabric. According to the user manual, you should never use thread size of 20 or lower. By doing so it might cause the machine to malfunction.
You should always check to see if the needle is in good condition before sewing. If the needle is bent then you should replace it with a new one. It is very dangerous to sew with a bent needle. A bent needle might break while the machine is being used.
Feed Dogs
This model is awesome because it has 7 point feed dogs. The higher the numbers of feed dogs a sewing machine has the better. It gives you more control of the fabric when you are sewing. It also gives you smooth feeding of the fabric even with multiple layers of fabric.
LCD Display Screen
It has a large lit LCD display screen. It is for you to see better. The displaying screen will show whatever choices you have made for stitch patterns, width and length of stitch in mm, either set to using single or twin needles, and to set to either automatically sew reverse or reinforcement stitches at the beginning and end of the stitching or not.
The screen will also tell you what foot you should be using once you have selected a stitch pattern. If you’d like you can click here to check the Brother ST150HDH current selling price.
Adjust The Width and Length Stitch
To adjust the width and length stitch, you can just use the + (plus) or – (minus) symbols. The stitch length is 5mm and the width is 7mm.
The very top or first button of + or – symbols is for adjusting stitch length. By pressing the plus symbol on the first button, you will be making the stitch length longer and pressing the minus symbol will make the stitch length to be shorter.
The second or bottom button is to adjust the stitch width. By pressing the plus symbol on the second button, you will be making the stitch width to be wider and pressing the minus symbol will make the stitch width to be more narrow.
Built In LED Light
The sewing area has a built in led light for you to see better when you are sewing. Once the machine is turned on the led light will go on. When the machine is off then the light will also go off.
Note: If the LED light is damaged then you need to take it to an authorized dealer shop to replace or repair it. You can’t fix it by yourself.
Speed Control Slider

You can use this machine to sew up to 850 stitches per minute. This is pretty darn fast. This feature will be great if you are doing sewing for a living and also it is great to use this feature to teach someone how to sew or doing a sewing lesson for your students.
It is super simple to use the speed control slider. To sew faster just move the slider to the right and to sew slower just move the slider to the left.
Start/Stop Button
This model has the option for you to operate the machine with a start or stop button in addition to a foot controller. It is always nice to have more than one choice.
For example, for whatever reason if you can’t find the foot controller then you can use this start or stop function to be able to continue on sewing.
A lot of sewing machines don’t have this built in function but this one does. Without the start/stop button and the foot controller then you can’t operate the machine and you can’t continue your sewing projects until you find or buy the foot pedal. This is definitely a plus to have.
Foot Controller
Like I said above, this is another way to operate the sewing machine. Here is a little note to remember if you want to go with this model.
Once the foot controller has been plugged in the machine then you can’t use the Start/Stop Button. You will be operating the machine with the foot pedal from now on unless you unplug the foot pedal and decide to use the Start/Stop button again.
You should not let your thread and foot pedal collect dust and if you are not using your sewing machine you should unplug the foot controller for safety purposes, like fire or electrical shock and definitely do not place anything on top of the foot pedal.
Twin Needle
 This machine has the twin needle feature. A twin needle can create two parallel lines of the same stitch with two different threads. Now it will give you even more creative ideas on your projects.
Just be sure to use the same quality and thickness of the threads for the upper threads when you are using the twin needle. This will require a twin needle and an extra spool pin to hold the thread.
Automatic Bobbin Winder System
The sewing machine comes with an automatic bobbin winder system, so it will take less time to set it up before you can start sewing.
Just follow the imprint directions on the top of the sewing machine to get the job done. The user manual is written in detail and with pictures to show you how to do it.
Bobbin cover – The cover is clear so you can monitor the amount of supply left on the bobbin.
Needle Threader Lever
This feature is a must to have and it will save you plenty of time on manually passing the thread through the eye of the needle.
Of course you can do it manually if you choose to do so, but it definitely saves you a lot of time and frustration. I wouldn’t go without this feature.
Free Motion Quilting
It is possible to do free motion quilting with this model, but you would have to buy a quilting foot separately for this to work since it doesn’t come with the purchase.
If you really want to do free motion quilting then you can find the quilting foot by clicking here. The price to purchase it is pretty decent to me. At least it won’t break your pocketbook. LOL…
Thread Cutter
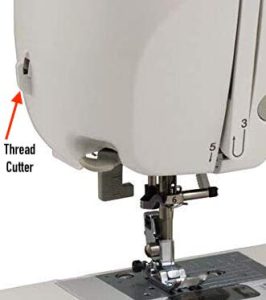
This doesn’t come with an automatic thread cutter but instead it does have a built in thread cutter on the side of the sewing machine.
It is up to you to decide whether to use it or not. Most of the time the owner of the machine doesn’t even know it exists there, so that’s why they don’t use it and use scissors instead.
It is handy if you can’t find your scissors at some point. I am serious, my things are not always in one place. It takes me a long time to find them.
That is because my things are usually taken by my family members and they never put them back where they’re supposed to be.
Needle Stop Position (Up/Down)
To allow you to sew more efficiently, you can change the needle position to stop on the fabric whenever you stop sewing. That makes it easier to turn or change direction on the fabric. In other words, it is to set the needle to stop sewing in the down position.
Of course you can set the needle to stop on the up position which means the needle is not on the fabric when you stop sewing. That makes it easy to pull out the finished sewing fabric.
The default setting for the machine on the needle position is to stop sewing on the down position which means the needle stops on the fabric. I hope this is clear enough.
Needle Position Button
To change the needle position just press this fast and easy button. This button doesn’t work the same as the above function (Needle Stop Position Up/Down). The above function is for you to set the machine to stop sewing in either the down or up position with the needle every time.
The needle position button works like this – Whenever you press the button the needle will raise or lower. It is pretty much whenever you press the button it will do it. It is pretty handy.
Thread Tension Dial
As the title said this is related to thread tension. A lot of us prefer to have options and this machine gives us the option to adjust the upper thread and the bobbin thread tension if you don’t have satisfactory results with the preset tension by either increasing or decreasing the tension with the tension dial.
Of course you would have to make sure the upper thread that is threaded and the bobbin has installed correctly and this is the first step. If not then it might not be possible to set the right thread tension.
If you can’t achieve the correct tension then you need to re-thread the upper thread and install the bobbin correctly.
If you are happy with the preset tension then just go with the machine’s settings and save the hassle of adjusting it.
If you’d like you can click here to find out more information about this model.
Reverse/Reinforcement Stitch Button
This function is used for securing the beginning and the ending of the seam so that it won’t go loose.
If the seam goes loose then all of your hard work of sewing will be wasted and you will have to sew another seam on it again.
This reverse stitch button works the same way as the reverse lever. It requires both to press down to sew several reverse stitches.
The only difference for this model is some of the stitch patterns can be set with the machine to automatically sew reverse or reinforcement stitches like the straight stitches, zigzag stitches, and reverse stitches.
Accessories
Here are the included accessories for this model. It comes with 9 feet.
Feet
- Zigzag foot (J) – This foot is already installed on the machine.
- Monogramming foot (N)
- Overcasting foot (G)
- Zipper foot (I)
- Blind stitch foot (R)
- Button fitting foot (M)
- Buttonhole foot (A)
- Walking foot
- 1/4″ piecing foot
Accessories
- Needle set – 6 total needles included. Two in 75/11 size, two in 90/14 size and two 90/14 size ball point needles.
- Twin needle
- Bobbin (4)
- Seam ripper
- Eyelet punch
- Large Screwdriver
- Cleaning brush
- Extra spool pin
- Disc-shaped screwdriver
- Small spool cap
- Medium spool cap
- Large spool cap
- Spool net
- Foot controller
- Bobbin case
- Accessory bag
- Soft cover
- Small screwdriver
- Stitch pattern plate
- Stitch pattern plate holder
- Operation Manual
- Quick Reference Guide
Brother ST150HDH Review
So far the Brother ST150HDH sewing machine has a very high average rating but there are not that many people who have given it a review yet. That is because this model is still very new, so not that many people know about it.
The popularity for this model is increasing every day. I can see more and more people are giving it a rating.
✅ Pros:
- Looks really beautiful and nice.
- Strong sewing motor.
- Can sew a lot of layers fabric at once.
- Light weight even with metal frame.
- Easy to use for either beginners or experts.
❌ Cons:
- No automatic thread cutter.
- No hardcover.
- No extended table.
Weight And Dimensions
This machine weighs about 10.14 pounds with a measurement of 16.26″W x 7.01″D x 12.48″H. The shipping weight is about 18.078 pounds with the measurement of 11.024″W x 22.835″D x 14.764″H.
Warranty And Manual
You might be asking where you can find the user manual. You can click here to download a copy. It does require adobe acrobat reader to open it.
The manual is pretty long and with very good information showing you how to use this model. It has 112 pages. The machine is covered by a 25 year limited warranty.
FAQ
Does this model come with an extended or wide table?
Sorry, this model doesn’t include an extended table and you might not be able to find it that easily. According to the manual, if you really want a compatible wide table to work with your projects then you need to find the product code or model number of SA552.


hi. do the feed dogs drop?
Yes, if you are using this sewing machine for free motion quilting.
Is this machine fairly quiet when Sewing. I have a heavy duty singer that is pretty loud when sewing
Quiet.. I love it.. stitches straight and beautiful!
I just purchased this machine..I love it! It is quiet sewing, easy to thread.. well lit workspace. The needle threader worked on the first try.. yay! Stitch selector is nice.. easy to read LED. I love the look of this machine. The stitches are smooth, not pulling.. nice flat, looks great! Definitely a “keeper” !
and thanks for this review!!